Papier Mache Hat
Featured Crafts
Supplies Needed
- Newspaper or paper for recycling
- Papier pache paste
- Mold (e.g. oval balloon, plastic flower pot, small plastic bucket, gallon water bottle)
- Acrylic paint
- Paint brush
- Aluminum foil or plastic wrap
- Petroleum jelly
- Scissors
- White glue
- Permanent marker
- Clear acrylic sealer (optional)
- Gift wrap paper or textured paper (optional)
- Things to accessorize your hat with: ribbon, string, felt, fabric flowers, feathers, buttons, etc.
STEPS
5Make 3 layers of papier mache.
Make three layers of papier mache on your mold. Here's a basic papier mache tutorial that you can follow.
8Build the brim.
Cover your work area with plastic wrap. Use a marker to draw the shape of your brim on the plastic wrap. Set your papier mache hat at the center.
Dip long strips of paper in papier mache paste and lay them down around the hat like radiating rays. This should help fix the hat in place and define the main shape of the brim.
9Mold the brim.
Your brim doesn't need to be flat. Make it more interesting by altering its shape while the papier mache hasn't quite dried yet.
a.) Curled edges - create curled edges on the brim like those of a cowboy hat or sheriff's hat. Place an object to hold up the edge that you intend to curl. Leave it there until the brim dries.
10Color the hat.
There are two ways to color your papier mache hat. You can either paint the hat or use colored paper for the topmost layer of your papier mache.
a.) Paint - once the papier mache is dry, paint the entire hat, except the inside that touches your head, with acrylic paint. You can paint details, if you like.
When the paint dries, you can spray the hat with clear acrylic sealer. This helps moisture-proof your hat and make it last longer.
If you plan to paint your hat using light colors, you may need to prime the hat with white acrylic paint before painting with the final colors. This helps hide any print or colored paper underneath the paint.
First, paint the hat with white acrylic paint. Once the paint dries, paint with the final colors of acrylic paint. You can spray with a coat of clear acrylic sealer after the paint dries.
b.) Colored paper - use colored paper for the topmost layer of your papier mache hat.
Try paper with interesting texture and print such as kraft paper. natural fiber paper, tissue paper or non-glossy gift wrap. Use a clear-drying papier mache paste such as white glue mixture for this final layer.
Once the papier mache dries, you can spray with clear acrylic sealer to help moisture-proof your hat.
11Decorate the hat.
Decorate your hat with a variety of materials like ribbons, bows, flowers, string, lace, pom-poms and lots of fun details.
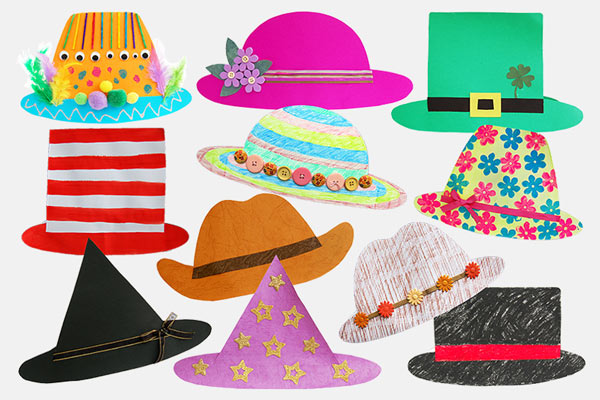
A length of leather string and a paper star wrapped in aluminum foil made this brown hat into an awesome cowboy/sheriff's hat. Scroll down below to see all the hats we came up with.
More Ideas
Use gift wrap paper.
Beautiful gift wrap paper made this hat extra elegant and chic. When choosing your paper, remember that glossier and thicker paper do not absorb the papier mache paste as well. You will need to soak the paper longer in the paste and put more effort in patting down the edges of the paper strips on the mold.
Make a bell-shaped hat.
Do you know that a bell-shaped hat like this is called a cloche hat? We achieved this shape using an oval balloon for the hat's top. See Step 9-C on how we made a short drooping brim.
The hat's fabric-like texture is because of the natural fiber paper used to make the topmost papier mache layer. A flower brooch was pinned on as a lovely hat accent. These coffee filter flowers would also make colorful hat accents.
Make a fun sombrero.
To make this somberero, we used a tall plastic flower pot as a mold for the hat's top. We described how to make an upturned brim in Step 9-B.
The hat was decorated by gluing felt shapes and painting some dots and wavy lines. You can make your hat more festive by gluing small pompoms, sequins, colorful string and some crepe paper strips.


